
+30 Tools and Platforms you Need to Increase your Website’s Traffic Fast
January 4, 2018
How to Start and Grow your Blog Like a Pro (2021 Edition)
March 11, 2020
Growing an email list is a priority for any professional blogger or content marketer. In case you’re wondering why, here are some stats to prove the importance of email marketing to you:
- Email is the most effective marketing channel with 4400% ROI and $44 for every $1 spent.
- Email is 40 times more effective at acquiring new customers than Facebook or Twitter.
- 72% people prefer to receive promotional content through email, compared to 17% who prefer social media.
- Email subscribers are 3 times more likely to share your content via social media than visitors from other sources.
Jaw-dropping? I know.

The bad news is the rate at which your visitors would convert to subscribers (the opt-in rate) is very low — as low as 2%. This means that typically from each 100 visitors, only 2 of them would subscribe to your email list.
Have trouble with website traffic? Check out 8 Watertight Tactics to Amplify your Content for more Visits (and Links) or 30 Tools and Platforms you Need to Increase your Website’s Traffic Fast.
The 2% optin rate is basically what more than half of blogger and content marketers achieve with their traffic. If you’re getting better results, congrats, you’re among the top elite content marketers who get the most from their traffic.
If not, no worries!
There are some proven tactics that top bloggers and content marketers have been doing in order to increase their email opt-ins. Here are three of them:
#1. Use contextual optin forms to increase optin rate
#2. Use on-site retargeting
#3. Use pop-ups to grow your email list
But before we dive into these tactics, I want to introduce an all-in-one email capturing tool that enables you to do all of these tactics. The tool that
- Enables you to have all the effective ways to grow your email list in one dashboard in your wordpress site
- Enables you to add any kind of optin form or popup to your website
- Enables you to do any kind of A/B testing to find out the best performing optin form variation
- Blends well with your theme and your email service provider
- Has a dedicated support team
- And most importantly, offers a one-time payment option which no one else does.

The ultimate all-in-one email capturing tool I’m talking about is Thrive Leads.
This beautifully designed conversion-optimized plugin makes it super easy for you to capture emails and set up funnels that will automatically convert your visitors into buyers. Just connect your email service provider to Thrive Leads and start using the great features it offers.

How to make optin forms using Thrive Leads:
With Thrive Leads, creating optin forms is super easy. The first thing you should do is create a group for your optin forms. This is extremely helpful for categorizing and organizing your forms in the future. Click on the “Add New” button in the leads group section.

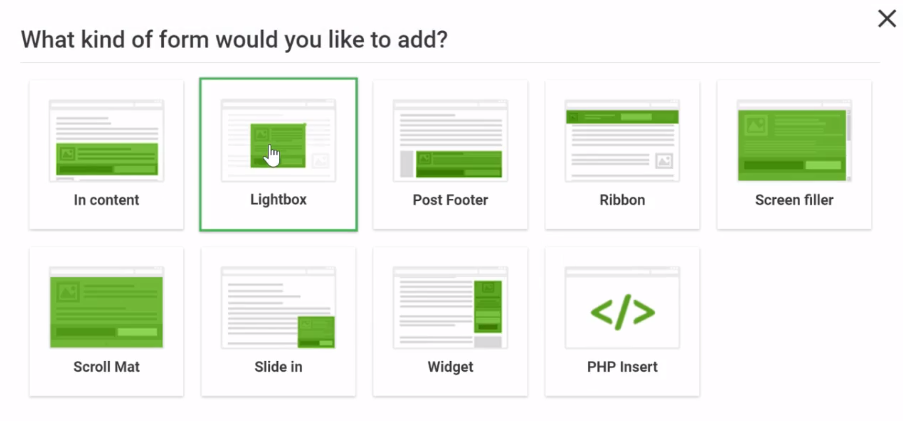
Then choose a name for your first group and add whatever kind of optin form you want. You can create in-content forms, light boxes, post footer optin forms, ribbons, whole screen fillers, scroll mats, slide ins, and widget forms.
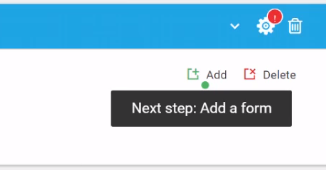
After you chose a category, simply add one form by clicking the add button and choose a name for your new optin form.
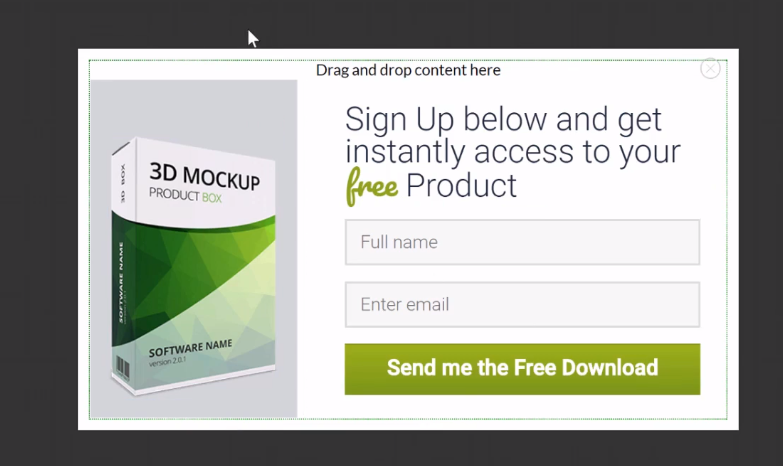
You can then start editing your form by clicking the edit design option, choosing a template, and making changes to it.

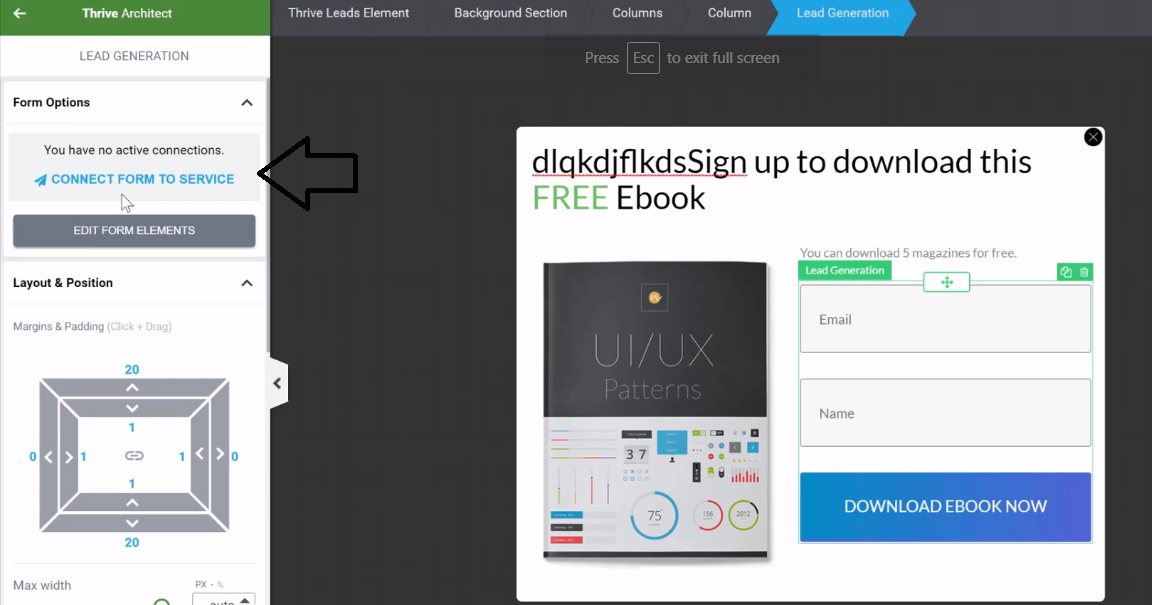
After you designed your form, you need to connect it to your email service provider by clicking “Connect Form to Service” button and then add a new API connection.
Well, now that you know how to make optin forms with Thrive Leads, let’s get down to the best practices that will burst your email list in a short time:
#1. Use contextual optin forms to increase optin rate:
One of the biggest mistakes that bloggers and digital marketers make is offering irrelevant giveaways in exchange for visitors’ email addresses.
It is not odd these days to see an email marketing guide offer in a page about social media, or even worse a blogging mastery course offer in a post about fitness and exercising.
The problem here is that the people who visit a page about social media are less likely to subscribe to an email marketing offer. You might have a level of success with this method but until you offer a contextual giveaway, you won’t have a high level of success.
On the other hand, there are some people who suggest that you create a specific giveaway for each of your blog posts. But imagine how time consuming and frustrating this would be. You need to spend some more time and energy to create a giveaway for every blog post that you painstakingly created.
Seems impossible to me.
A better way is offering giveaways based on your content categories and tags. Every content category and tag attracts a kind of visitor with specific intentions and needs. In order to capture their email addresses, you need to show specific optin forms and popups in different post categories and tags.
This way your SEO optin forms will only be shown in your SEO category and your social media giveaway will only be shown in your social media category.
You can even go further and offer a Facebook-related giveaway to the Facebook tag in your social media category so that only people who visit the posts about Facebook will see your Facebook-related optin forms.
How to make contextual optin forms with Thrive Leads:
To provide context for your optin forms in Thrive Leads, you need to determine your targeting options. Simply head over to your Thrive Leads dashboard and choose the targeting options for the forms you created before.

From there you can choose which pages of your website should show the form and which page shouldn’t. You can almost determine any conditions for the pages that should show the form.

Here’s how you can optimize the context of your forms to see the most results:
1. Determine in what content categories a form should appear.
The first step to provide a good context for your forms is deciding in which content categories your form should be displayed. A copywriting form should only be shown in the copywriting category of your site, and an SEO form should be displayed in the SEO category. You might even want to add a discount exit popup to your sales pages.
2. Determine in what content tags a popup should appear.
The next level is going deeper to determine the pages you want to show your form in based on their tags. Maybe in the social media category of your website, you need a specific popup for your Facebook posts. You can easily do this by choosing the Facebook tag.
3. Disable your general popups in landing pages and sales pages.
Don’t forget to exclude your popups from your landing pages and sales pages as they might have a negative effect. Your landing pages and sales pages are not a good place to offer giveaways. However, it’s a good idea to have an exit popup with a good offer (discount or a freebie) on these pages as it lures the visitors into doing the purchase.
4. Determine what URLs you want to show specific popups in
One of the best ways to increase your popup optin rates is showing exclusive offers in the URLs you’re using for your campaigns. Say you’re using a specific landing page for your Facebook campaign. By offering a discount coupon, you can both collect their email and prompt them to do the purchase.
#2. Use on-site retargeting
On site retargeting means showing tailored and targeted messages and offers to a group of your visitors on your own site. It happens that you want people who visit a page from a specific referrer to see a different set of optin forms and popups.
For example, you’ve written a guest post for a high-traffic website and know that it’s going to drive a lot of traffic to the page you’ve included in the post. It’s a great idea to show different kinds of optin forms and popups with messages tailored for the people who click on your links from that website.
You want these visitors to see a popup with a message “exclusive to a website’s fans”, a popups that includes an eye-catching and useful giveaway that will lure visitors into subscribing.
This is done through on-site retargeting.
How to do on-site retargeting with Thrive Leads:
Thrive Leads has an amazing feature that allows you to show one other variant of your optin forms and popups in a specific page.
You can show a whole other bunch of optin forms and popups in a page that would normally display a predesigned set of forms and popups.
To do this you need to use the “Smart Link” feature of Thrive Leads. This feature allows you to create a special link of a page on your website with an “Already subscribed” state of the optin forms and plugins.
Whoever enters the page via the special link will see the already subscribed state of your optin forms (i.e. a different variation of your optin forms). You can then easily use these links in your campaigns and guest posts to offer some tailored messages and offers to visitors.
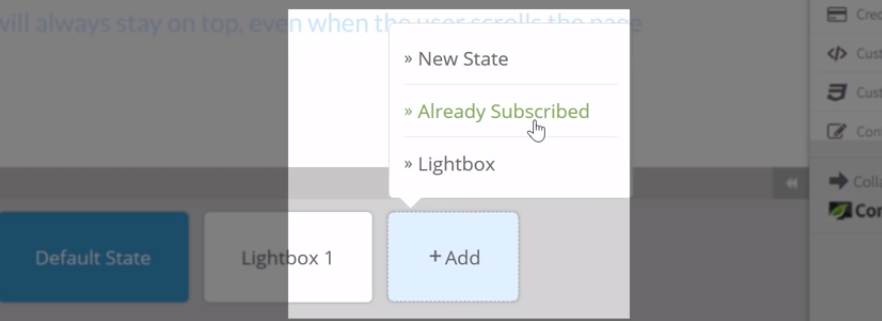
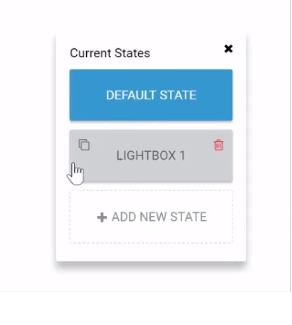
Go to your opt-in form or popup in your dashboard and select edit design. In the design page, head over to the states section (bottom of the screen) and click on +Add, then choose Already Subscribed.
This is the state of the optin form you want your already subscribed visitors to see when visiting your page. You can easily redesign another opt-in form in the Already Subscribed state or simply hide the form all along by clicking on the eye shape on top of the button.
After you assigned an Already Subscribed state to the form, it’s time to generate a link for the already subscribed state of your forms. This way the people who visit the page from that link will see the already subscribed version of the forms.
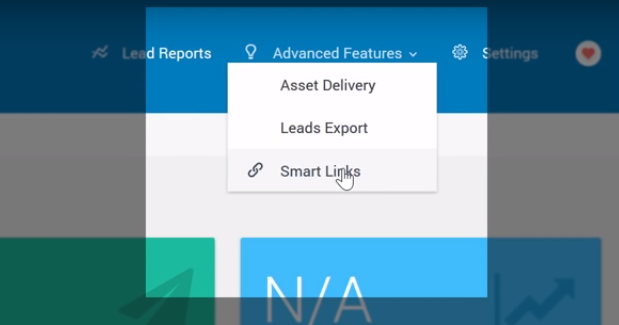
Head over to the top right-hand side of your Thrive dashboard and and from the Advance Features drop-down menu choose Smart Links.
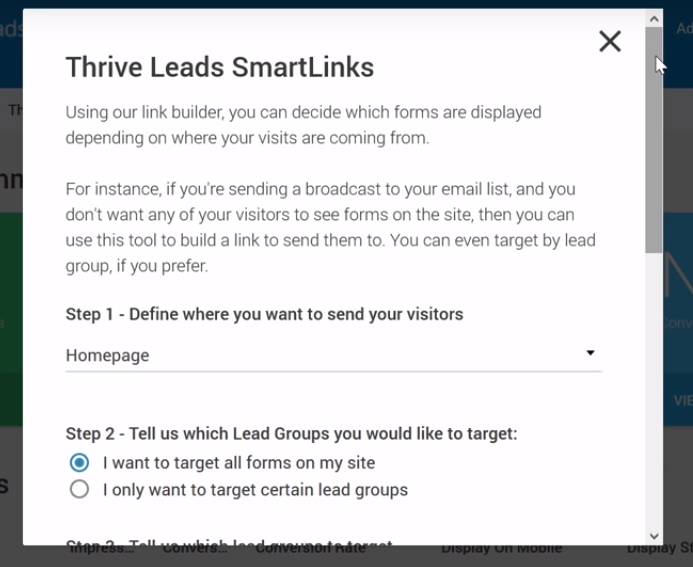
In the Smart Links screen, choose the page you want to create a link for. In step 1, select post and then choose a page.
You then need to select the optin forms you want to include in the link in step 2. You can choose all of your forms or a specific lead group. Then choose whether to hide them or show their already subscribed state. And finally, select the option “last as long as possible” to make the effects permanent.
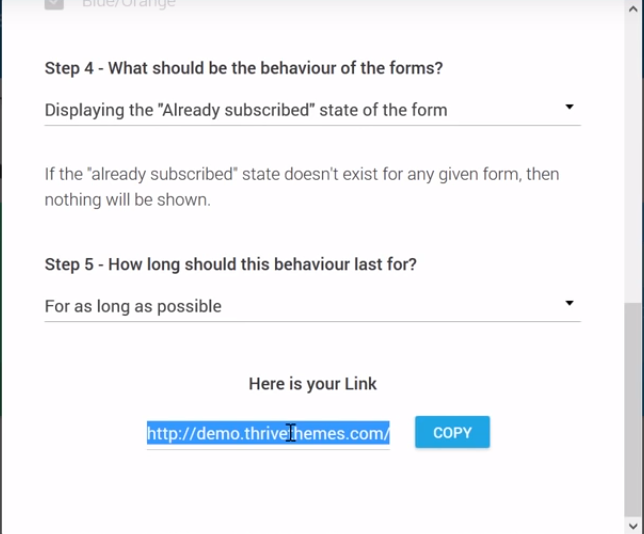
You can then copy the link and send it to your subscribers. The people that visit your page through this link will see the already subscribed version of your optin forms and popups.
You can use this feature to show targeted and tailored messages and offers to visitors from specific sources such as your Facebook campaigns or your guest posts.
#3. Use pop-ups to grow your email list:
For those who don’t know what pop-ups are, they are some boxes that appear on the screen with an offer and a call to action inside them.
Some people find them annoying, others, like me, look forward to finding out what exclusive offers are contained in them. Typically popups are relevant to what you’re looking for in a site and will help you get your work done faster.
Do pop-ups really work:
Whether pop-ups will work for you or not depends a great deal on how you use them. But in general supposing that you contain intriguing offers in your pop-ups and show them in an appropriate manner, you’ll see a huge increase in your opt-in rate.
In one case, a blogger could increase her opt-in rates by 1,375% simply by adding light boxes to her blog. Previously she only displayed her offer in the sidebar and got a 0.4% opt-in rate, but after using the lightboxes, she could get a 5.5% opt-in rate which is amazing.

Another study shows that although there are some pop-ups with a 50% conversion rate, the average pop-up conversion rate is 3.09%. This number is of course in addition to the conversion rate you get from other sign-up and offer forms you have on your website.
The bottom line is pop-ups do work if used properly and in context. Here’s how to make conversion-optimized pop-ups with Thrive Leads:
1. Increase your opt-in rate by showing contextual pop-ups
One of the best ways to increase your popups’ optin rates is containing contextual offers in them.
Offering a generic giveaway in your popups is one of the biggest optin rate killers of all time. You can’t expect a lot of people to sign up for a copywriting course in a page about SEO’s best practices and vice versa. Your copywriting pop-up shown in a blog post about SEO would at least be irrelevant and at most intrusive.
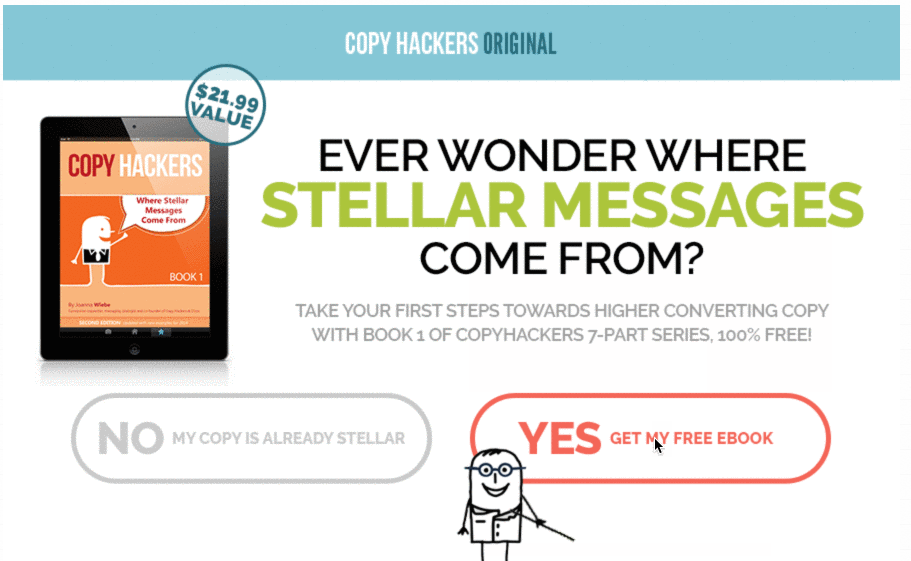
This pop-up from Copyhackers is one of the best examples to follow.
To provide a better context for your pop-ups, you need to determine on which pages of your website a pop-up with a specific offer should appear and in what pages it should not appear.
How to provide context for your Popups in Thrive Leads:
As already described, you can easily define your targeting options according to your posts’ categories, tags, URLs, etc. (see the previous section). You can also use Smart Links to show tailored and targeted popups to the visitors who click on the link.
2. Use two-step popups:
Two-step popups are a kind of popup optin forms that are shown after visitors click on a specific button on a page.
This kind of popups will increase your optin rates because they are not intrusive and are shown only when people intend to see them (they first have to take an action to see them), and so people have a better user experience with them.
A case study by Unbounce’s Oli Gardner shows that “On Click” triggered popup conversion rate is 1,147% better than the exit popup. Whereas an exit popup had only a 2.05% conversion rate, a click-triggered popup had a 25.56% conversion rate.

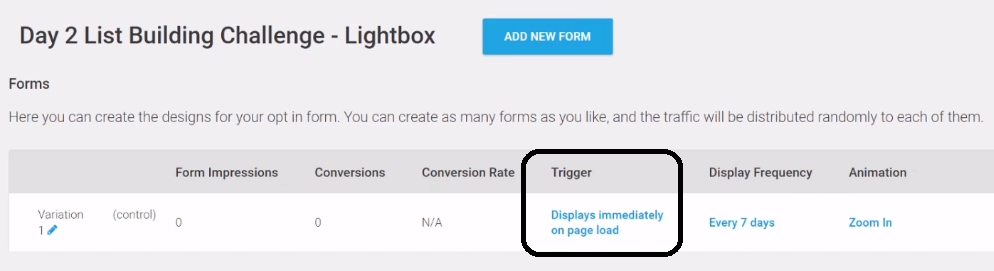
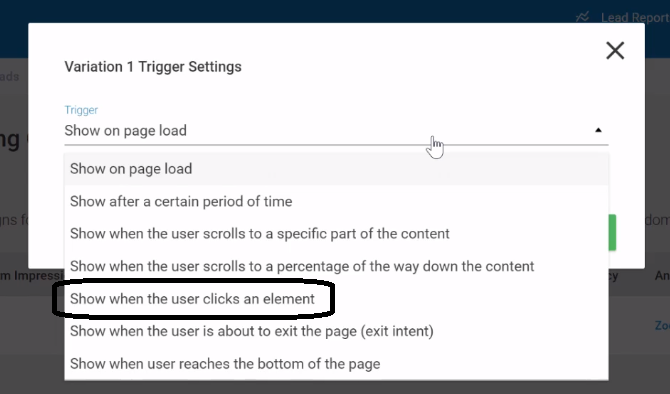
How to make two-step popups in Thrive Leads:
Thrive Leads provides different possibilities for two-step optin forms. You can easily set a trigger for your lightboxes and select that they be show upon clicking on a specific element.
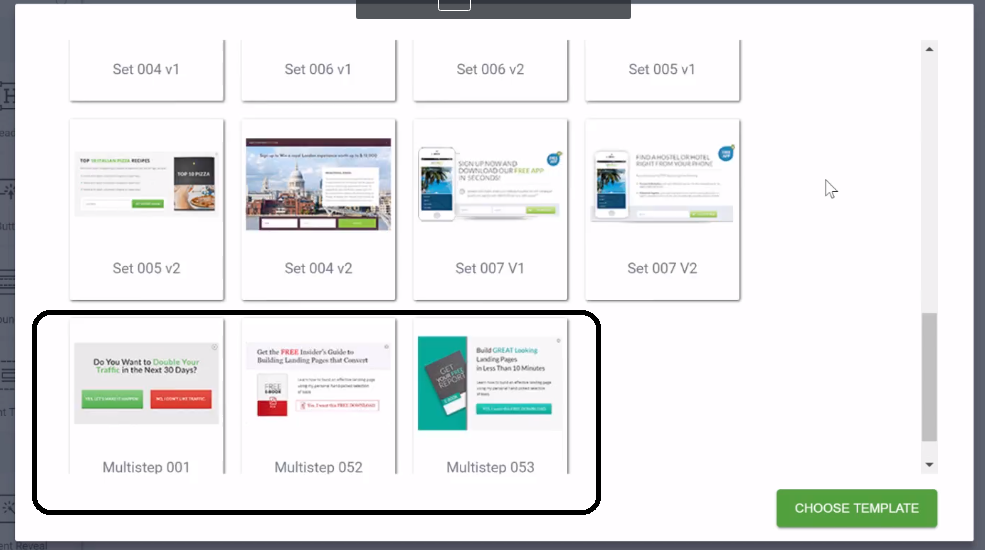
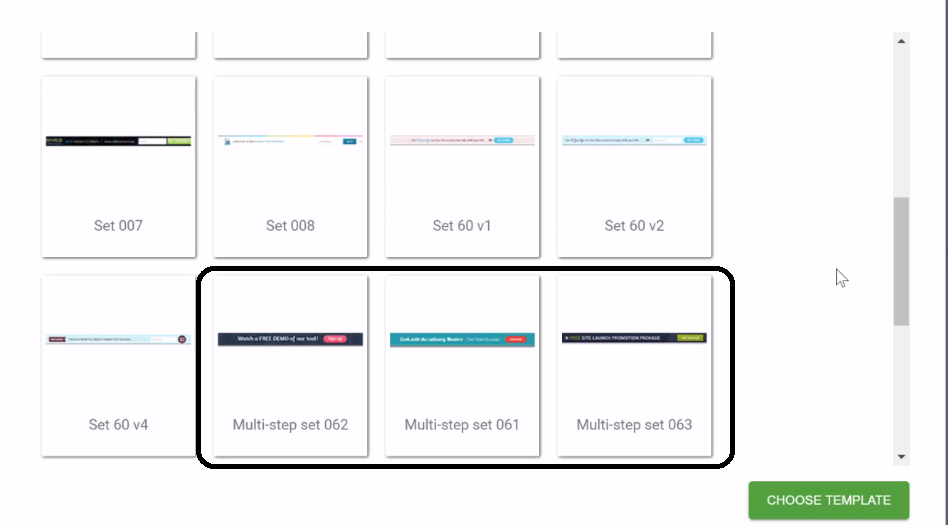
Alternatively, you can choose a multistep template for your light box. Create a lightbox, click on “edit” and then choose a multi-step template.
You can also create a ribbon with a button that when clicked on will display a popup with an offer.
To do this, you first need to make a ribbon. In your Lead Groups, click on “add new type of optin form” and select Ribbon. Then add a ribbon and click on edit design. Then choose a multi-step template from the templates categories and start editing the ribbon.
Then from the states section, select the Lightbox state and edit the lightbox that visitors will see after clicking on the ribbon’s button and start editing the popup that will be seen once people click on the ribbon’s button.
3. A/B test your popups:
There are different types of popups and each one of them has a different conversion rate. It’s up to you to A/B test and find out the best performing type of popups for your niche and audience.
Even apart from the popup type, you need to keep testing different elements of your popups such as the copy, the image, the call to action, colors, timing, triggers, etc.
So brace yourself for a never-ending process of testing and finding out the best performers.
How to A/B test your popups with Thrive Leads:
One of the most nifty features of Thrive Leads is possibility of A/B testing your optin forms and popups.
To run A/B tests on any of your forms including your popups, you need to first make a different variation of the form.
In order to A/B test two different kinds of forms against each other (for example slide-in forms v.s light boxes) you need to add a new form and then run your tests.
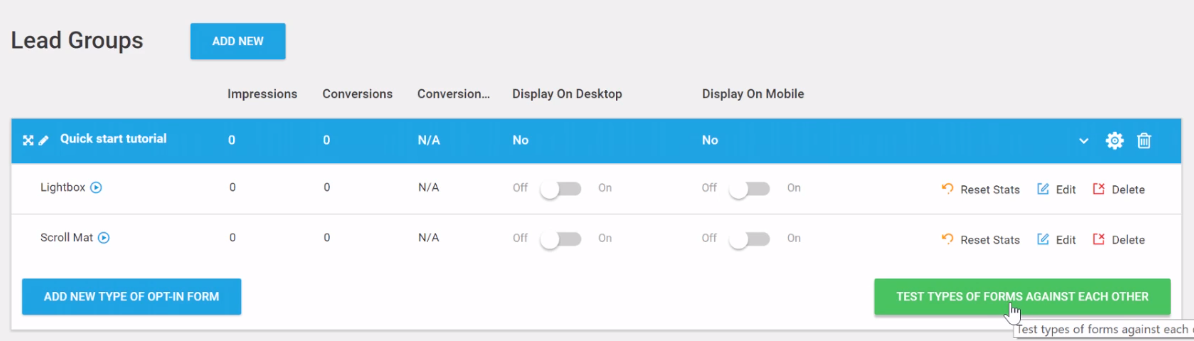
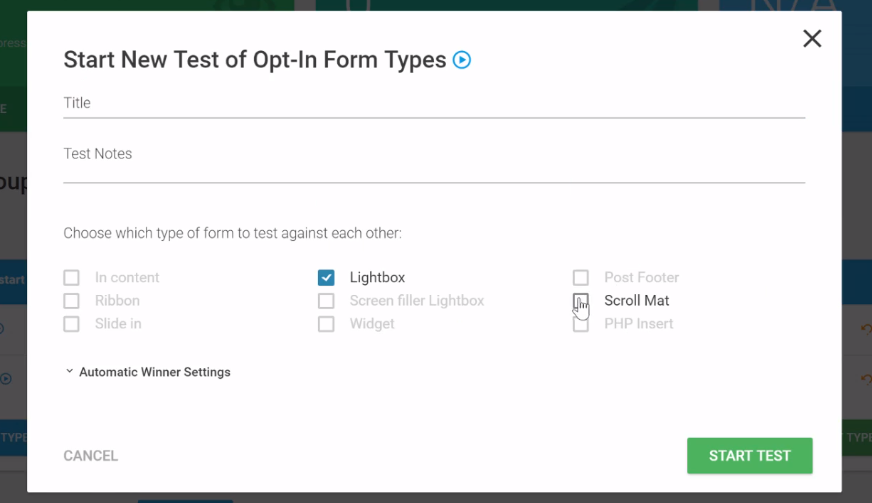
In your Lead Group section, add as many forms as you like and then click on “Test Types of Forms against each other”.
Then set a name for the test and select the form types you want to test against each other.
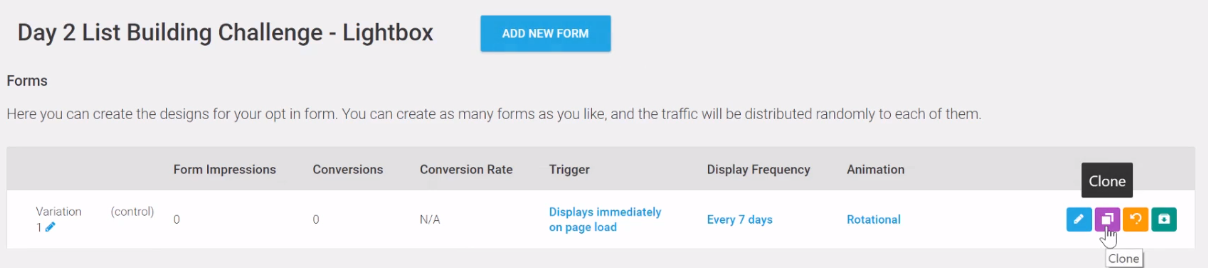
In order to test a small element of your form, you need to clone it. Click on the clone button of your form in order to create the exact same form.
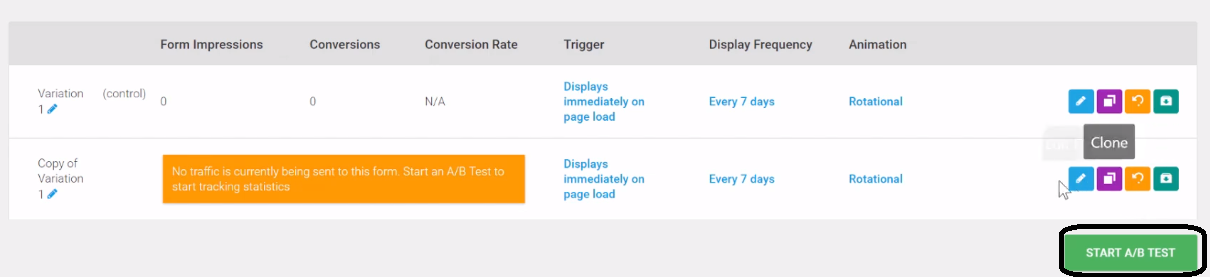
After this, you need to make a change in the cloned form. The change could be in any element of your form. It could be the copy, the image, the CTA, time triggers, etc.
After you made your variations, you simply need to click on the “Start A/B Test” button to run your tests.
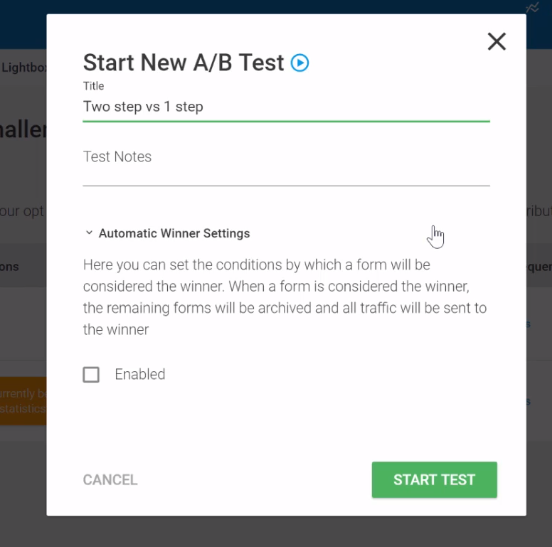
Give your test a name and enable automatic winner setting if you like. This will set your test on autopilot and automatically choose the best performing form variation as the default form.
Finally:
Growing an email list is one of the most difficult and time-consuming activities bloggers and content marketers should do. It will even get more excruciating if you don’t know how to do it right or are confused which tools to use.
In this guide, you read about how to exponentially increase your email list using one of the most cost effective and best performing email capturing tools in the market, Thrive Leads.
Using this tool, you can easily:
- Add any kind of optin forms and popups to your website
- Use contextual optin forms to increase optin rate
- Do on-site retargeting
- Optimize your popups to grow your email list

2 Comments
The pluggin is a life saver, I just bought one. Thanks for the guide.
It sure is! Hope you enjoy using it 🙂